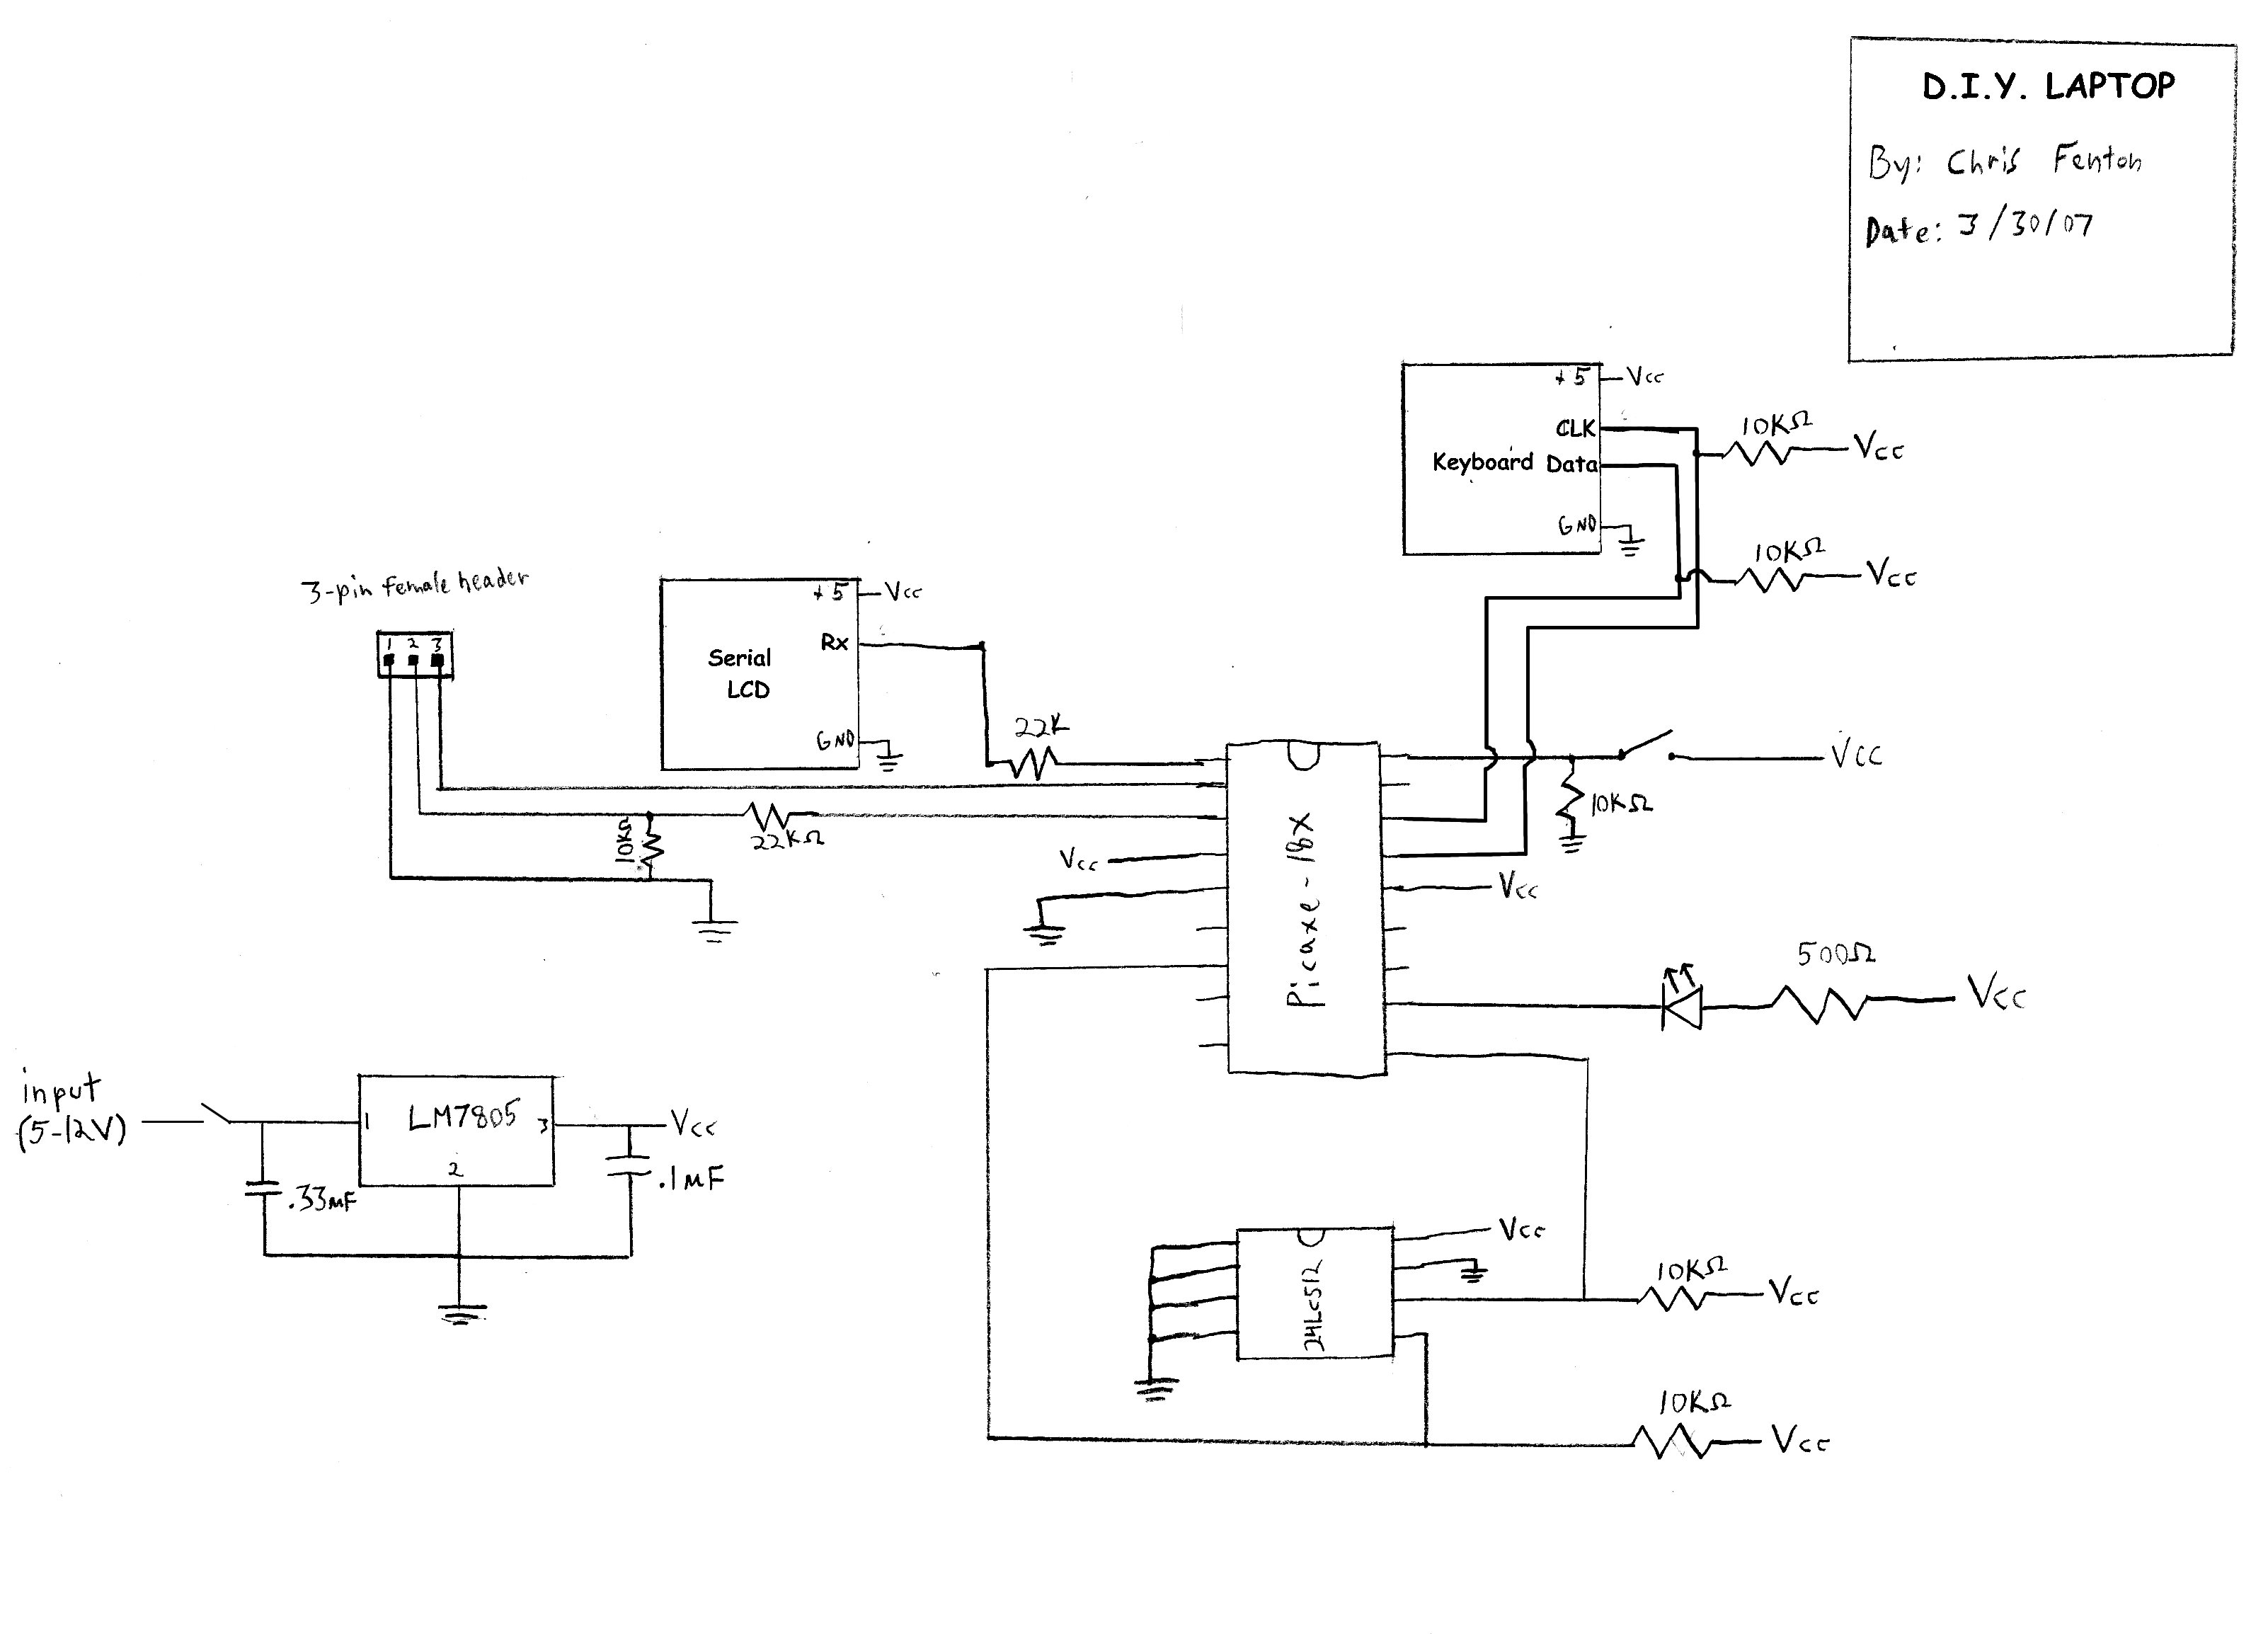
I had an idea for a project bouncing around in my head for a long time to build a “self-hosted development platform.” I felt like I had missed out on all the homebrew computing fun of the 1970’s and 80’s, and I wanted to try to build a computer that I could actually write and run code on. Using a Picaxe-18X microcontroller, along with a 20×4 character LCD screen, an external 24LC512 EEPROM and a tiny PS/2 keyboard, I made the DIY Laptop.

The software environment has 4 main components:
1) Program Manager – This is just a simple menu system for choosing which program/task to run. There is no true filesystem, but the program manager uses “slots” where a fixed number of programs could be stored. There were 10 slots for executable programs and 4 slots for text files.
2) Text Editor – I needed a way to type in code, so I wrote a simple text-editor that used 6-character lines to enter in code – 3 characters for an Op-code and 3 characters for an argument. There was no support for comments, line numbering, inserting/deleting lines, etc. It was extremely limited, but it lets you pretty easily type in short programs.
3) Compiler – It’s more of a “tokenizer/assembler” than a compiler, but I needed a way to convert plain ASCII into a more compact form for speed/memory purposes. This will read in a text file and convert each opcode/argument pair into a 2-byte instruction. It starts from the beginning of the text file, and runs until it gets to a line labeled “XXX” instead of an accepted opcode. It then stores the “compiled” code in one of the 10 available program slots.
4) Interpreter – Due to the way a PIC microcontroller is structured (and consequently the Picaxe), it can’t actually alter its own machine code. The solution was to run a “virtual machine”/interpreter for a language I made up called “Chris++” with the following opcodes:
- LOAD
- ADD
- COMPARE
- SUBTRACT
- JUMP
- Jmp-IF-EQUAL
- STORE
- LOAD_IMMEDIATE
- SerToSlave
- MULTIPLY
- DIVIDE
- JmpNEQ
- GETKEY
- WAIT_FOR_SLAVE
- SET_SBID
- READ_ADC
- Get_SBID
- DISPLAY
- AND
- OR
- XOR
- ANDNOT
- ORNOT
- XNOR
- End
- RTN
The language started off as an emulator for a simple 6-bit processor I had designed using schematic capture, but gradually developed into a full, if limited, language.
Why is this so cool? Programming is easy…
Mainly because 1) I actually did it. The parts are pretty easy, but it was a hassle to get everything working properly in such a limited environment, and 2) It all fits into 2 kilobytes of BASIC code! That is *not* a lot of space to fit a text editor, assembler, program manager, and interpreter, even if you do get to use a “high-level” language like BASIC.
Where is the code?
In the spirit of open-source, here is the full source code for everything! Its not commented very well (and some of the comments are just plain wrong), but it’s free, it works, and you’re free to play with it.
And Schematics?
Ask and you shall receive (right-click -> View Image for larger image)

More Pictures!

Here you can actually see how awkwardly large it is.

Here is a shot of the laptop with the insides exposed.

Here is a close-up of the circuit boards I used. It’s a *very* simple circuit.
 A nice shot of it closed with the hinges and power switch visible.